Customize Your Patient Self-Scheduling Experience
Last updated: August 7, 2026
Osmind supports patient self-scheduling natively through a patient-facing scheduling interface, where patients can search for providers, view real-time availability, and book appointments without staff intervention. Scheduling rules can be configured based on factors such as provider, appointment types, availability, locations, and other practice settings.
This article walks through how to configure your self-scheduling settings, personalize the patient-facing booking experience, and preview your booking link end-to-end.
Set Your Availability
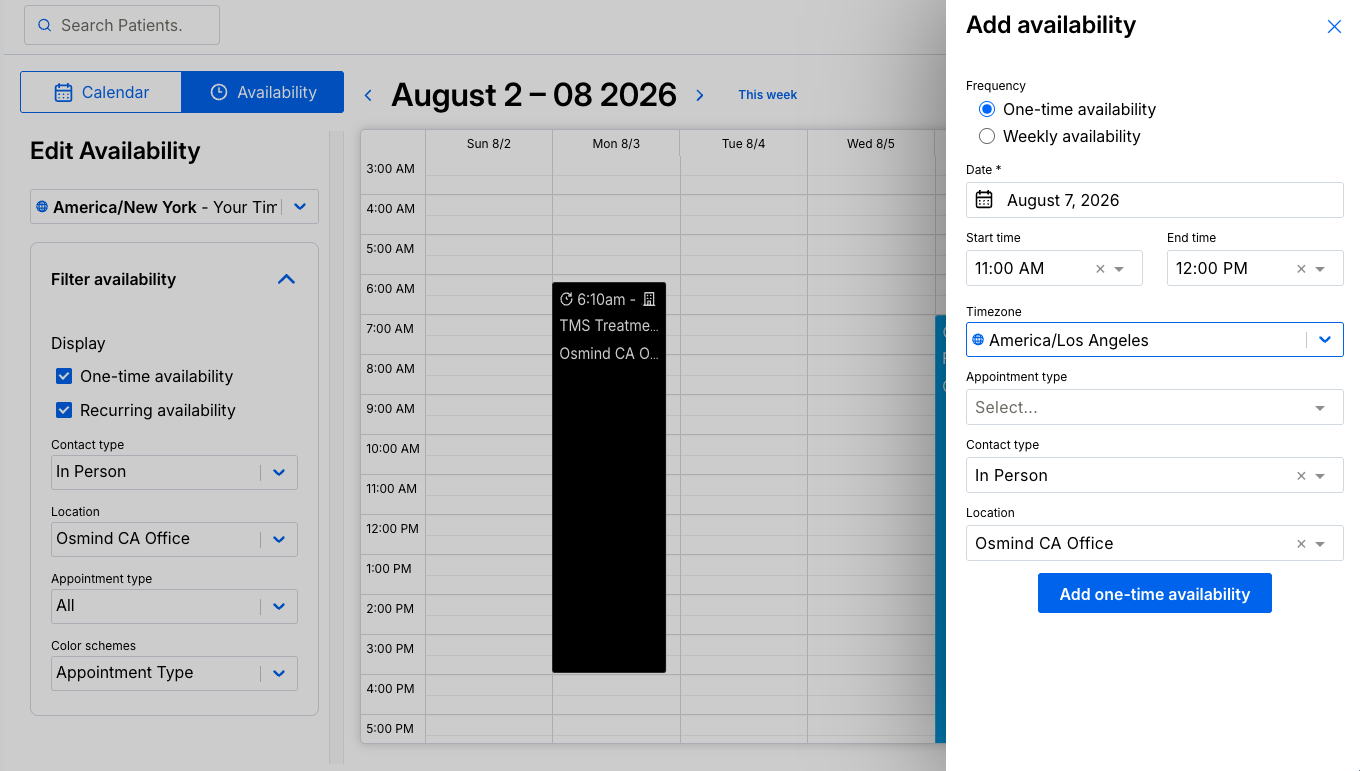
Before patients can self-schedule, you'll need to set your availability. Availability is what determines the time slots patients can see and book — without it, self-scheduling has nothing to offer.
Go to Calendar > Availability
Set recurring availability (time blocks that repeat weekly) or one-time availability (specific dates that don't repeat)
Save
Once availability is set, patients can book directly into those open slots.
Enable Patients to Self-Book Appointment Types
Within Osmind, you have the option to make each individual appointment type "Bookable" by patients.
Navigate to the Gear icon on the top right of your provider account > Settings
Select Appointment Types from the menu
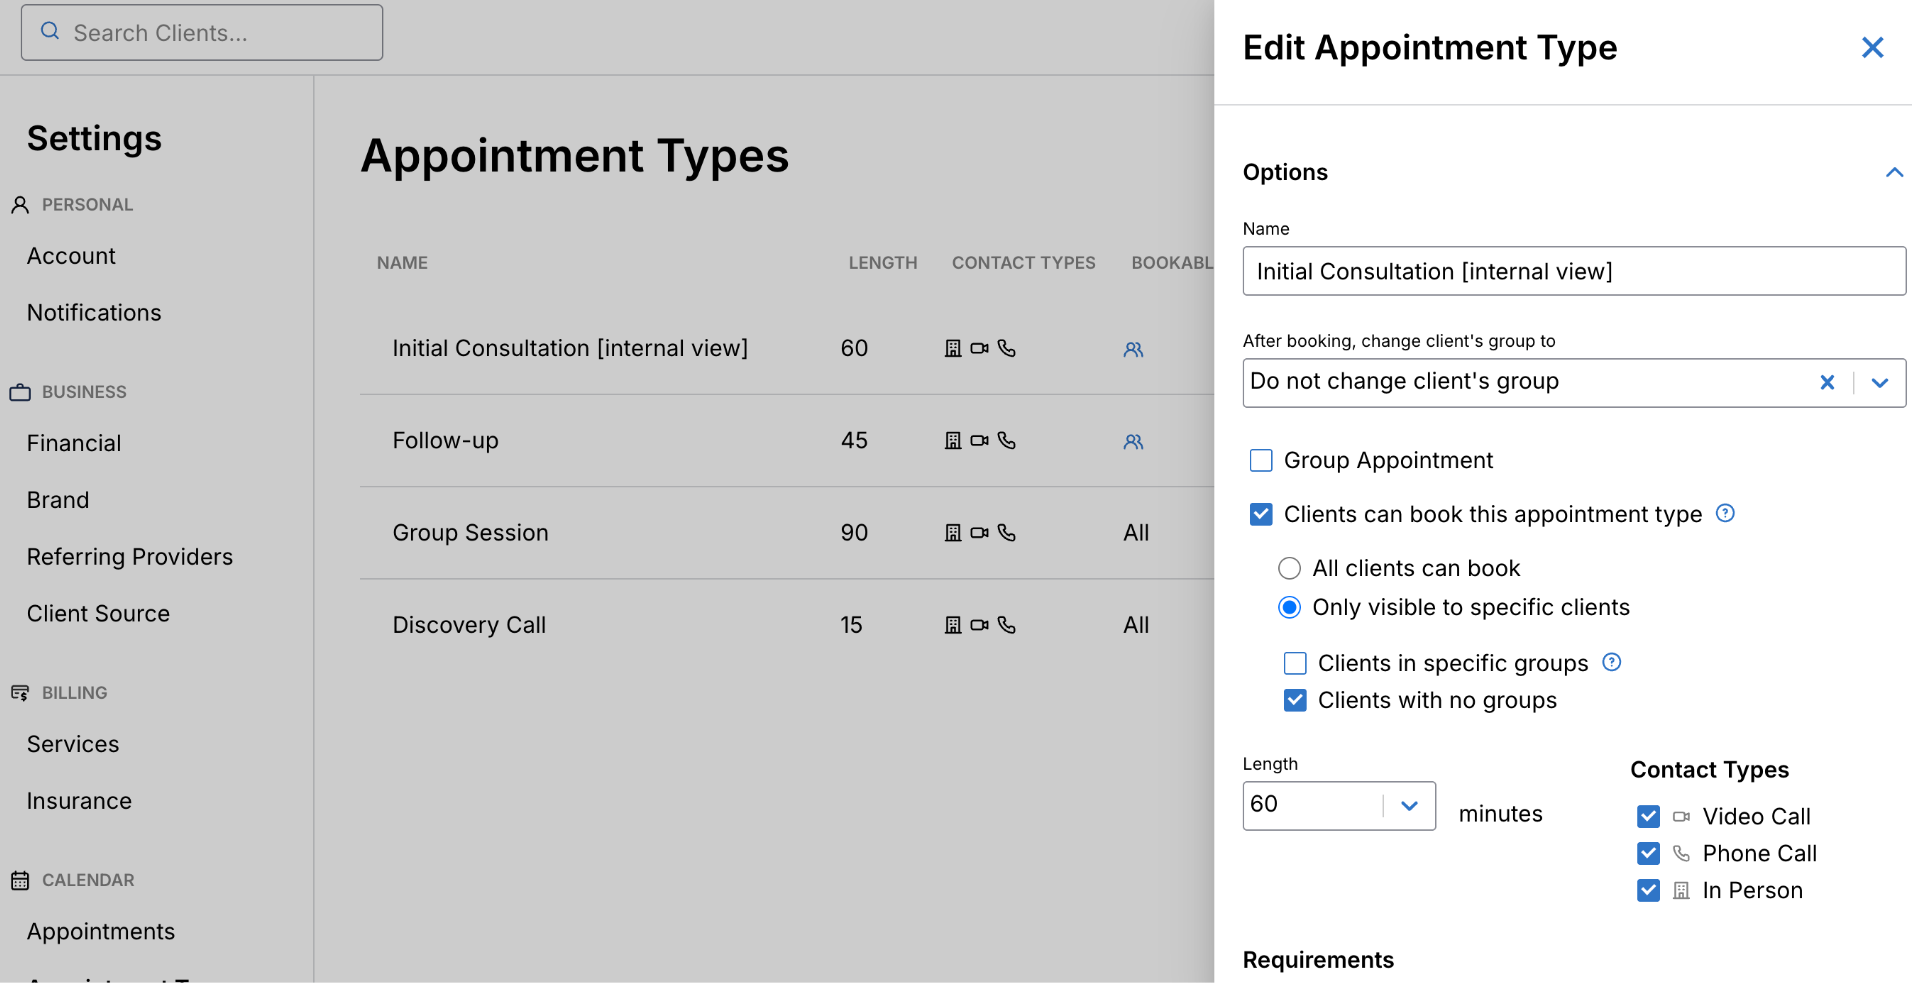
Find the appointment type you'd like to adjust booking settings for > Click [...] > Edit
A side panel drawer will appear > Select or deselect the Patients can book this appointment type option
Further nuance can be applied to allowing all patients, only specific patients, or patients in specific groups to be allowed to book
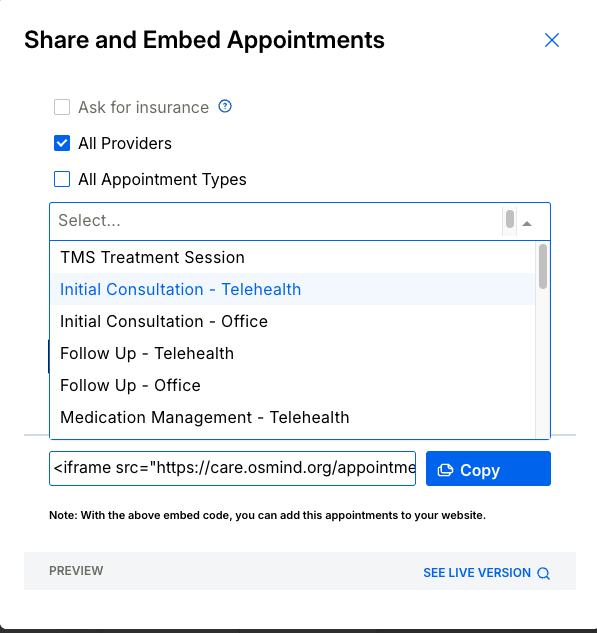
Patients can still self-book an "unbookable" appointment type if you share the embed or sharing URL for the appointment. For example, if you share the booking URL with the patient via direct message or email, they can follow the prompts to book.
If you make an appointment "bookable" by patients, patients will see it as a visible option when viewing your calendar as well as when logged into their Osmind patient account.
Add Patient-Facing Appointment Name & Description
You can customize what your patients see when booking appointments by editing in the Self-Scheduling tab.
Go to Settings > Self-Scheduling
Here you will see your appointment types that you've enabled for patient booking.
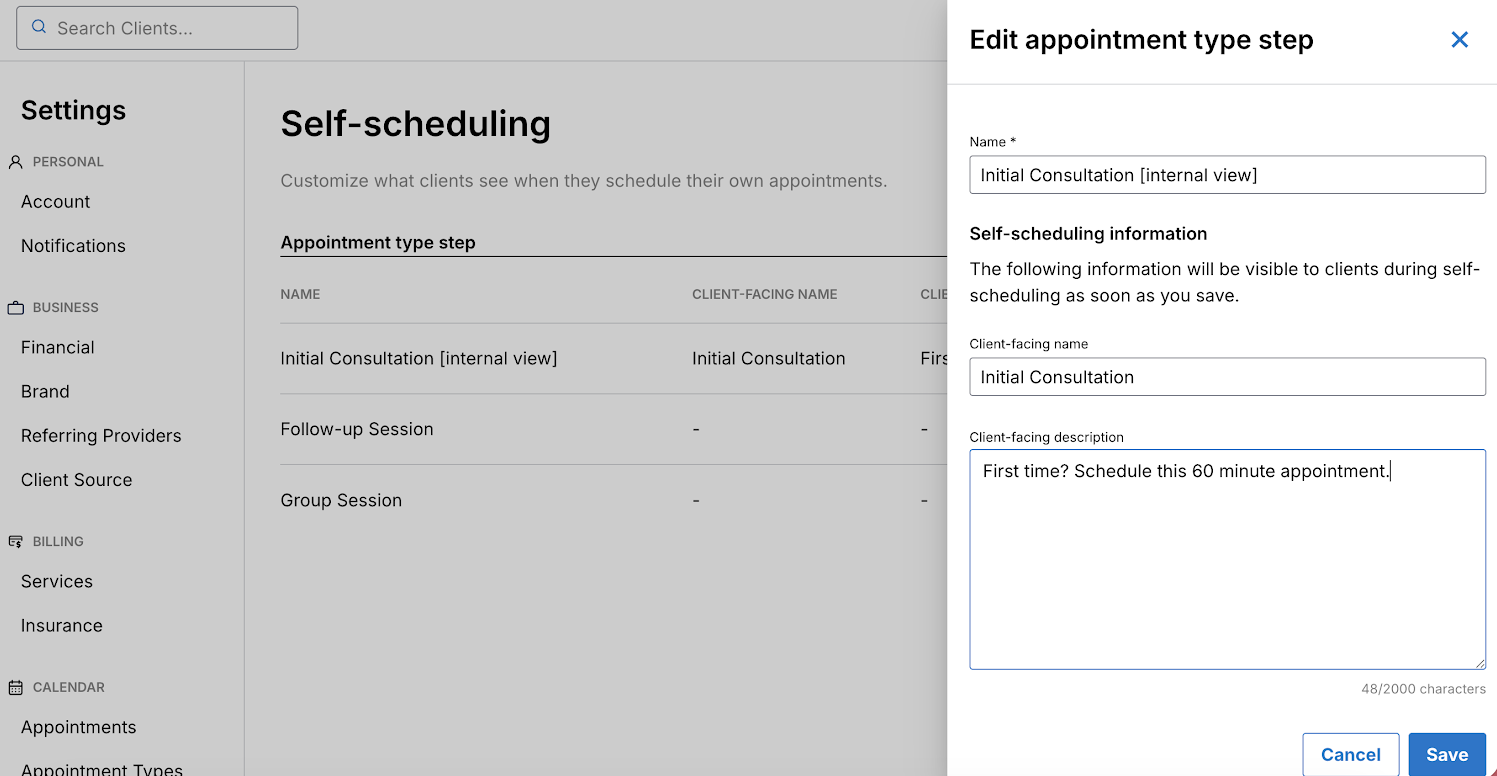
Click the pencil icon to edit the patient-facing name and description of the appointment type.
In this edit modal, you are able to create an appointment type name and description that patients will see, that is separate from your internal appointment name. This is helpful when patients are selecting which appointment to book. You can include helpful information, such as how long the appointment is, who should book it, etc.
The Name* is for internal-view-only, and will not be visible to patients unless you do not add a patient-facing name.
The Patient-Facing Name is what patients will see anywhere they see an appointment name (booking, calendar, reminders).
The Patient-Facing Description is what patients will see when selecting an appointment type in the scheduling process.
Be sure to always click Save to apply your updates.
Branding Your Booking Link(s)
Your booking link automatically reflects your practice's brand colors, giving patients a consistent, professional experience from the moment they land on your scheduling page.
Brand colors are pulled from your organization's branding settings. To update them:
Go to Settings > Brand
Update your primary brand color and logo as needed
Changes will be reflected across all patient-facing booking links automatically
Preview the Patient Booking Experience
Once you've configured your appointment types, bios, and branding, it's worth walking through the booking experience the same way a patient would. To do this, generate the booking link for an appointment type and either use the Preview option within Osmind, or paste the link into an incognito browser window to experience the full flow live.
This is a great way to verify that patient-facing names and descriptions read clearly, your branding appears as expected, and the right appointment types are visible to patients before you share the link publicly.